The Deployment grid (managers)
Station-by-station daily deployment that writes straight back to shifts.
For managers & adminsUpdated 31 August 2026
Open it from Schedule → Deployment (green button). Deployment answers "who stands where" per day and per outlet — edits write straight back to the shifts themselves; deployment never creates hours.
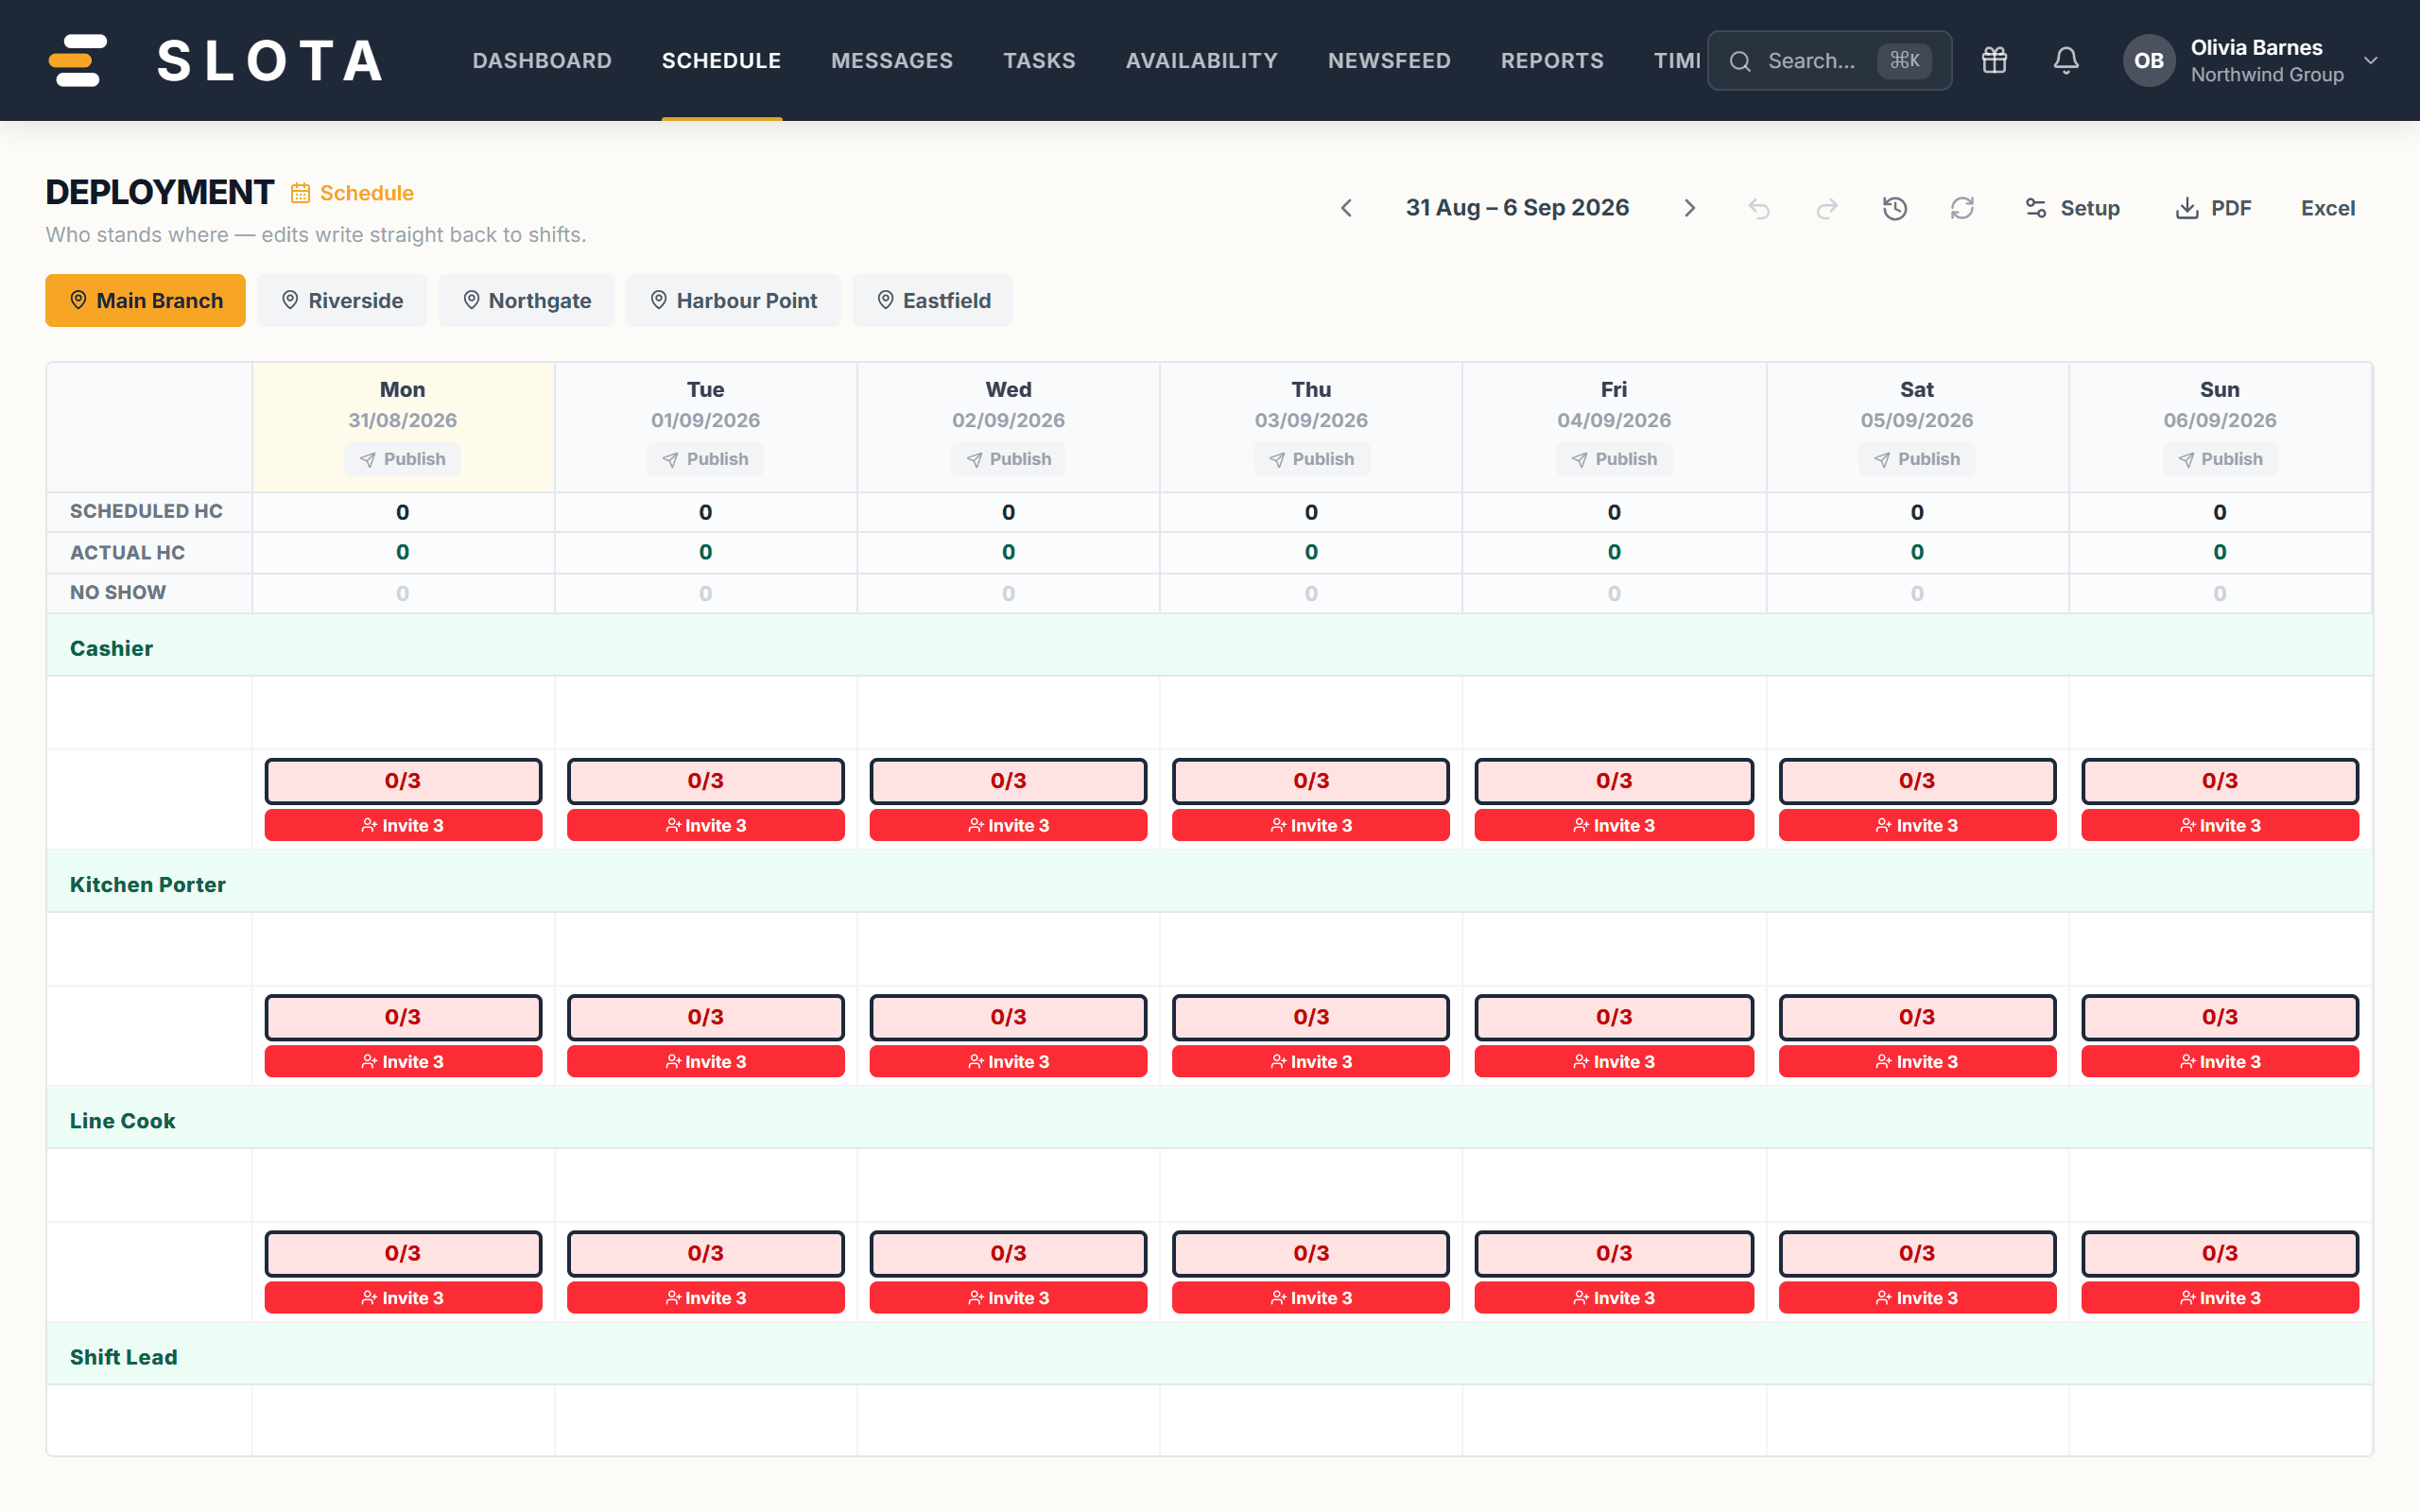
- Pick the outlet with the location tabs at the top.
- Each station (a position, with optional sub-positions) lists its people per day. Blue counters mean the station meets its required pax (e.g. 3/3); red counters are short (e.g. 2/3) with an Invite chip to offer cover.
- The HC GAUGE / SCHEDULED HC / ACTUAL HC / NO SHOW band shows daily headcount, live clock-ins, and no-shows.
- Click an empty cell to deploy someone: the picker lists people already scheduled that day, standby staff first; a mismatch badge warns when their position differs. "Show all scheduled" reveals everyone.
- Move people between stations by dragging, or click to pick up and click to drop. Right-click a person for the action menu.
- Amber outlines mean unpublished deployment changes; use each day's Publish to send changes with a confirmation ask, DM summary and push to affected staff.
Employees confirm deployment changes from the Android Action Inbox; a standby banner tells them not to report unless activated.
Practices
- Schedule first, deploy second. The picker only offers people already scheduled that day — an empty grid usually means an empty roster.
- Set required pax on the stations you actually staff to a number, so the red counters mean something. A station with no target never goes red and never prompts you.
- Publish the day once you are happy with it, not after each move. Each publish notifies the affected staff.
- Use standby honestly. Standby staff are told not to report unless activated, and their clock-ins arrive flagged — that flag is the point.